Lecture Recording
The tools MS Teams or Zoom, which are installed on the lecturer's PC in all classrooms, can be used to record course units. The recording option for meetings is used for this purpose.
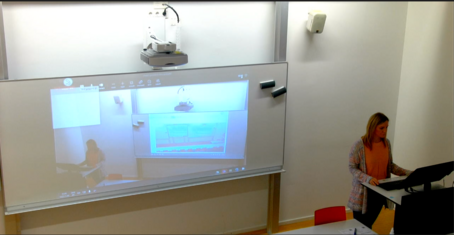
Teaching rooms equipped with a permanently installed camera are particularly suitable for recording course units. These cameras are linked to MS Teams and Zoom and preselected in the tools. You can choose between three different camera presets and switch between them at any time, even during a recording.
OVERVIEW OF ALL ROOMS WITH A Camera
In all classrooms that do not have a camera, a webcam must be used if a camera image is to be recorded via MS Teams/Zoom.
FAQs: Lv-Aufzeichnung
FAQs Lecture recording
What do I need to ensure in advance for a planned LV recording?
If you want to make recordings in MS Teams, please make sure that you have activated the following options in the control panel BEFOREhand (s. Screenshot):
Recording: Videoconferencing > Teams functions > enable recording > accept terms of use
Screen Sharing : Videoconferencing > Teams functions > Screen-Sharing share the entire desktop > accept terms of use
ATTENTION: After you have accepted the terms of use, it may take several hours for the authorizations to be adjusted.
To be able to make recordings in Zoom, please make sure that you have activated the following option in the control panel BEFOREhand (s. Screenshot):
Recording: Videoconferencing > Zoom functions > enable recording > accept terms of use
What is recorded?
Camera
When the camera is activated, the camera image is recorded. You can choose between 3 camera presets by (repeatedly) clicking on the "LCAST" button on the touch panel (lecture hall) or in the control panel (seminar room) on the lecturer's table:
Preset 1: Lecturer's desk area: Lecturer's desk/monitor + 1 projection screen are visible; WITHOUT tracking; the light on the camera is constantly blue
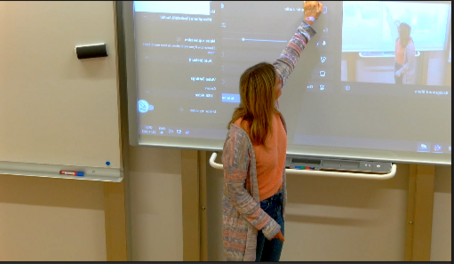
Preset 2: Tracking mode: Camera follows the lecturer in the entire front area; orange LCAST button on the touch panel or blue light on the button and blue flashing light on the camera indicate tracking. The "start point" for tracking is the area of the lecturer's desk. When tracking mode is selected, the camera focuses on the person in this area. If a person other than the presenter is being tracked, press the LCAST button again until you return to the "Tracking mode" preset.
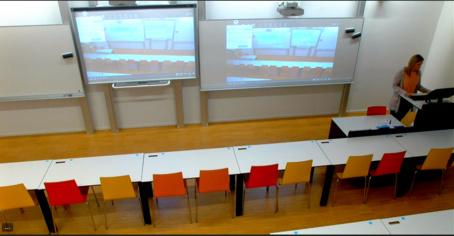
Preset 3: Teaching room area: both projection surfaces + the largest possible area of the teaching room are visible; WITHOUT tracking; the light near the camera is constantly blue
Audio
The room-specific microphone (Sennheiser HS2-1 neckband microphone) is used to record what you say in optimum audio quality. However, students' comments will only be clearly audible in the recording in classrooms with ceiling microphones. Therefore, please repeat the students' comments if you are in a room without ceiling microphones.
Shared screen
If you want to record screen content, e.g. your PPT slides, PDFs, etc., you must split the screen in MS Teams/Zoom.
Note: If you are playing a video with sound that should also be heard in the recording, make sure that you check the "Include system audio" (MS Teams) or "Enable audio" (Zoom) option when sharing.
What do I need to bring to the classroom?
Microphone:
To transmit the sound, you will need the room-specific wireless microphone for the respective classroom. You can borrow this from the IT Service Desk in the TC (site plan) before the start of the course.
Only pocket transmitters with headset (https://www.sennheiser.com/globalassets/digizuite/41011-en-hs_2_quick_guide_06_2018.pdf) are handed out.
One microphone can be used per room. Exceptions: several microphones can be used in the Audimax, in the Teacher Training room you do not need a wireless microphone.
Inform the IT assistants at the Service Desk that you will be recording a lecture. The IT assistants will also be happy to help you put on the headsets correctly.
Mobile phone: The person who starts the MS Teams/Zoom meeting in the classroom must confirm the login using 2-factor authentication on the mobile phone.
How do I start and end a lecture recording?
Open MS Teams/Zoom on the lecturer's PC. Log in with your WU account (Attention: 2FA authentication!)
Start the meeting. You have either created it in advance or start it spontaneously in the classroom.
Activate the camera (correct name: USB Video) and select the appropriate camera setting for you using the LCAST button.
Recommendation for Zoom: Activate HD for the camera in the video settings (without HD, only a reduced image section is transmitted). To do this, click on the small arrow next to the camera symbol, select "Video Settings" and tick HD.Check that the correct microphone is selected: Audimax and lecture hall 180: Lexicon Alpha In/out; seminar room 30, lecture halls 60, 120, 170: Realtek(R).
Inform your students BEFORE a course recording that you are recording the course (see Leitfaden Recht)!
TIP: Set notifications to mute in the tools for the duration of the recording so that no notification sounds or pop-ups appear during the recording.
Start the recording as soon as you are ready:
MS Teams: „…More“ > „Record and transcribe“ > „Start recording" (s. Screeshot)
Note: A transcription is automatically started with every recording. If you do not need this, you can end the transcription manually.Zoom: „Record“ in the menu bar (s. Screenshot) (if the button is not visible, first click on the 3 dots "...")
In Zoom, you have the option of pausing and resuming the recording. This option is not available in MS Teams.
End the recording:
MS Teams: Click ob "... More" > "Stop recording"
Zoom: Cick on „Stop Recording“ (s. Screenshot)
Where do I find the recording?
MS Teams Recording
After finishing the recording in MS Teams, you will find the mp4 file in the following locations:
in your local OneDrive folder under „Aufnahmen" (s. screenshot)
in the OneDrive folder in the browser under https://wu-my.sharepoint.com > Eigene Dateien > Recordings
in the MS Teams meeting chat (s. screenshot) (even if the chat was not activated during the meeting)
in the MS Teams meeting files (s. screenshot)
NOTE: The recording of an MS Teams meeting has an expiration date of 60 days by default, after which it will be deleted. Before this happens, you as the owner of the recording will receive an email informing you of the impending deletion.
TIP: Download the video and save it to another location OR change the expiration date of the recording (Details > Expiry date) (s. Screenshot) to prevent it from being deleted.
Zoom Recording
After the recording in Zoom is finished, the recording is processed and you will receive an e-mail notification as soon as the video is available. You can find the mp4 file in the Zoom cloud ("Recordings" tab or directly at wu-ac-at.zoom.us/recording/).
NOTE: The recording of a Zoom meeting is deleted by default after 15 days.
TIP: Download the video and save it to another location. Zoom provides you with several versions of the mp4 file (see screenshot):
The video with the shared screen and the camera image (= speaker view)
The video with camera image only (= speaker view)
The video with shared screen only
The audio-only file
How do I prevent students from seeing the recording before I have edited it?
Zoom
Only you have access to Zoom recordings, even if students have participated in the Zoom meeting.
MS Teams
Students only see the video of the course recording in the MS Teams chat if they were participants in the MS Teams meeting. This is not usually the case for a classic course recording. In this case, it is sufficient if you as the course instructor and/or tutor are participants in the Teams meeting and therefore have access to the video.
If students are listed as participants in the MS Teams meeting or have taken part in it via a link invitation (e.g. when streaming a course), the video is immediately accessible to these students in the MS Teams chat.
If this is not desired, we recommend the following procedure (preferably shortly after the end of the recording):
Open the video directly from MS Teams in Stream (s. screenshot)
Click on „Share“ > „Zugriff verwalten" (s. Screenshot)
Click on „Nicht mehr teilen" (s. screenshot)
This will prevent access for all NON-owners of the video (s. Screenshot)
Alternatively, you can set this setting directly in the video in the One-Drive folder (browser or local) via the right mouse button and "Manage access".
Participants in the meeting will then NO longer see a video under Files in MS Teams. If they click on the video in the chat, they will receive the information that they do not have access to the video.
This means that the video is only accessible to the owner (= person who started the recording) in their OneDrive folder.
How can I edit a lecture recording afterwards?
Before you make a course recording available to students or other people, you can edit it if necessary. To do this, upload the video to Planet eStream. The Planet eStream media platform offers you the following options:
Change title and description
add a preview image
add subtitles to the video
Create a chapter with a short description
Attach files under "Related media"
trim the video
add other media to the video (insert images, music or voiceover).
All instructions can be found in the Planet eStream WU Guide at „EDIT MEDIA" and "ENRICH MEDIA".
How can I share lecture recordings with others (e.g. to edit the video)?
As the owner of a course recording in Planet eStream, you can share the video with other people via a link, both internally at WU and externally. To share a course recording with other WU employees for editing, so that you can work together on the video and improve it, you can use the Grant Access function. All instructions can be found in the
PLANET ESTREAM WU GUIDE UNDER „SHARE MEDIA"
How do I provide a lecture recording for students?
Students benefit from having the course recordings directly accessible in Canvas in the respective course environment to be able to repeat or prepare content at their own pace.
We recommend that you do not save a course recording directly to your Canvas course, as storage space within a Canvas course is limited. Instead, upload the video to Planet eStream. There, the video is permanently saved in your account and is not subject to a deletion period. Embed the course recording in the Canvas course via the Planet eStream plugin (e.g. on pages, in discussions or in assignments). All instructions can be found in the
PLANET ESTREAM WU GUIDE UNDER „EMBED MEDIA IN CANVAS"
NOTE: You can also share both MS Teams and Zoom recordings with other people via the cloud using a link. However, please bear in mind the deletion periods (MS Teams: 60 days, Zoom: 15 days)!
Troubleshooting
Troubleshooting lecture recording
I don`t get an audio signal.
Go through the following steps to rule out all sources of error:
Make sure that your microphone is switched on.
Make sure that your microphone is NOT muted.
Check whether the sound output via the microphone generally works in the classroom (increase the volume in the room if necessary).
Ask online participants whether they receive a good audio signal (volume, intelligibility).
Use the touch panel for media and room technology to check whether audio sources have been muted.
If these steps do not lead to a solution, contact an IT assistant directly at the IT Service Desk or via DW 3003.
Troubleshooting in the room
If problems occur during a course recording, contact the IT assistants (AV hotline: 01 31336 3003).
IT assistants can help you on site with the following problems, for example:
Microphone, camera and sound: the microphone/camera is not working / you have borrowed the wrong microphone / you cannot hear anything in the lecture hall
Image loss, connection problems
MS Teams/Zoom: simple problems such as restarting the tools, checking microphone and speaker settings
I have questions about (re-)editing a lecture recording in Planet eStream
First, please take a look at the Planet eStream WU Guide, where you will find lots of information, instructions and tips.
If you cannot find what you are looking for, please contact the Digital Teaching Services team.
Lecture Recording & Lecture Streaming
![[Translate to English:]](/fileadmin/wu/_processed_/e/3/csm_042-Laptop-960_v1_2dc7c34c80.jpg)


